Arduinoで温度湿度を計測してLCDで表示する
記事作成日: 2019/12/04
記事更新日: 2019/12/04
※この記事はQiitaに投稿した記事を加筆修正しております。
Arduino UNOを使って温度と湿度を計測できるようにするための配線メモです。
環境
※秋月電子で温度湿度センサーを買う場合はここ
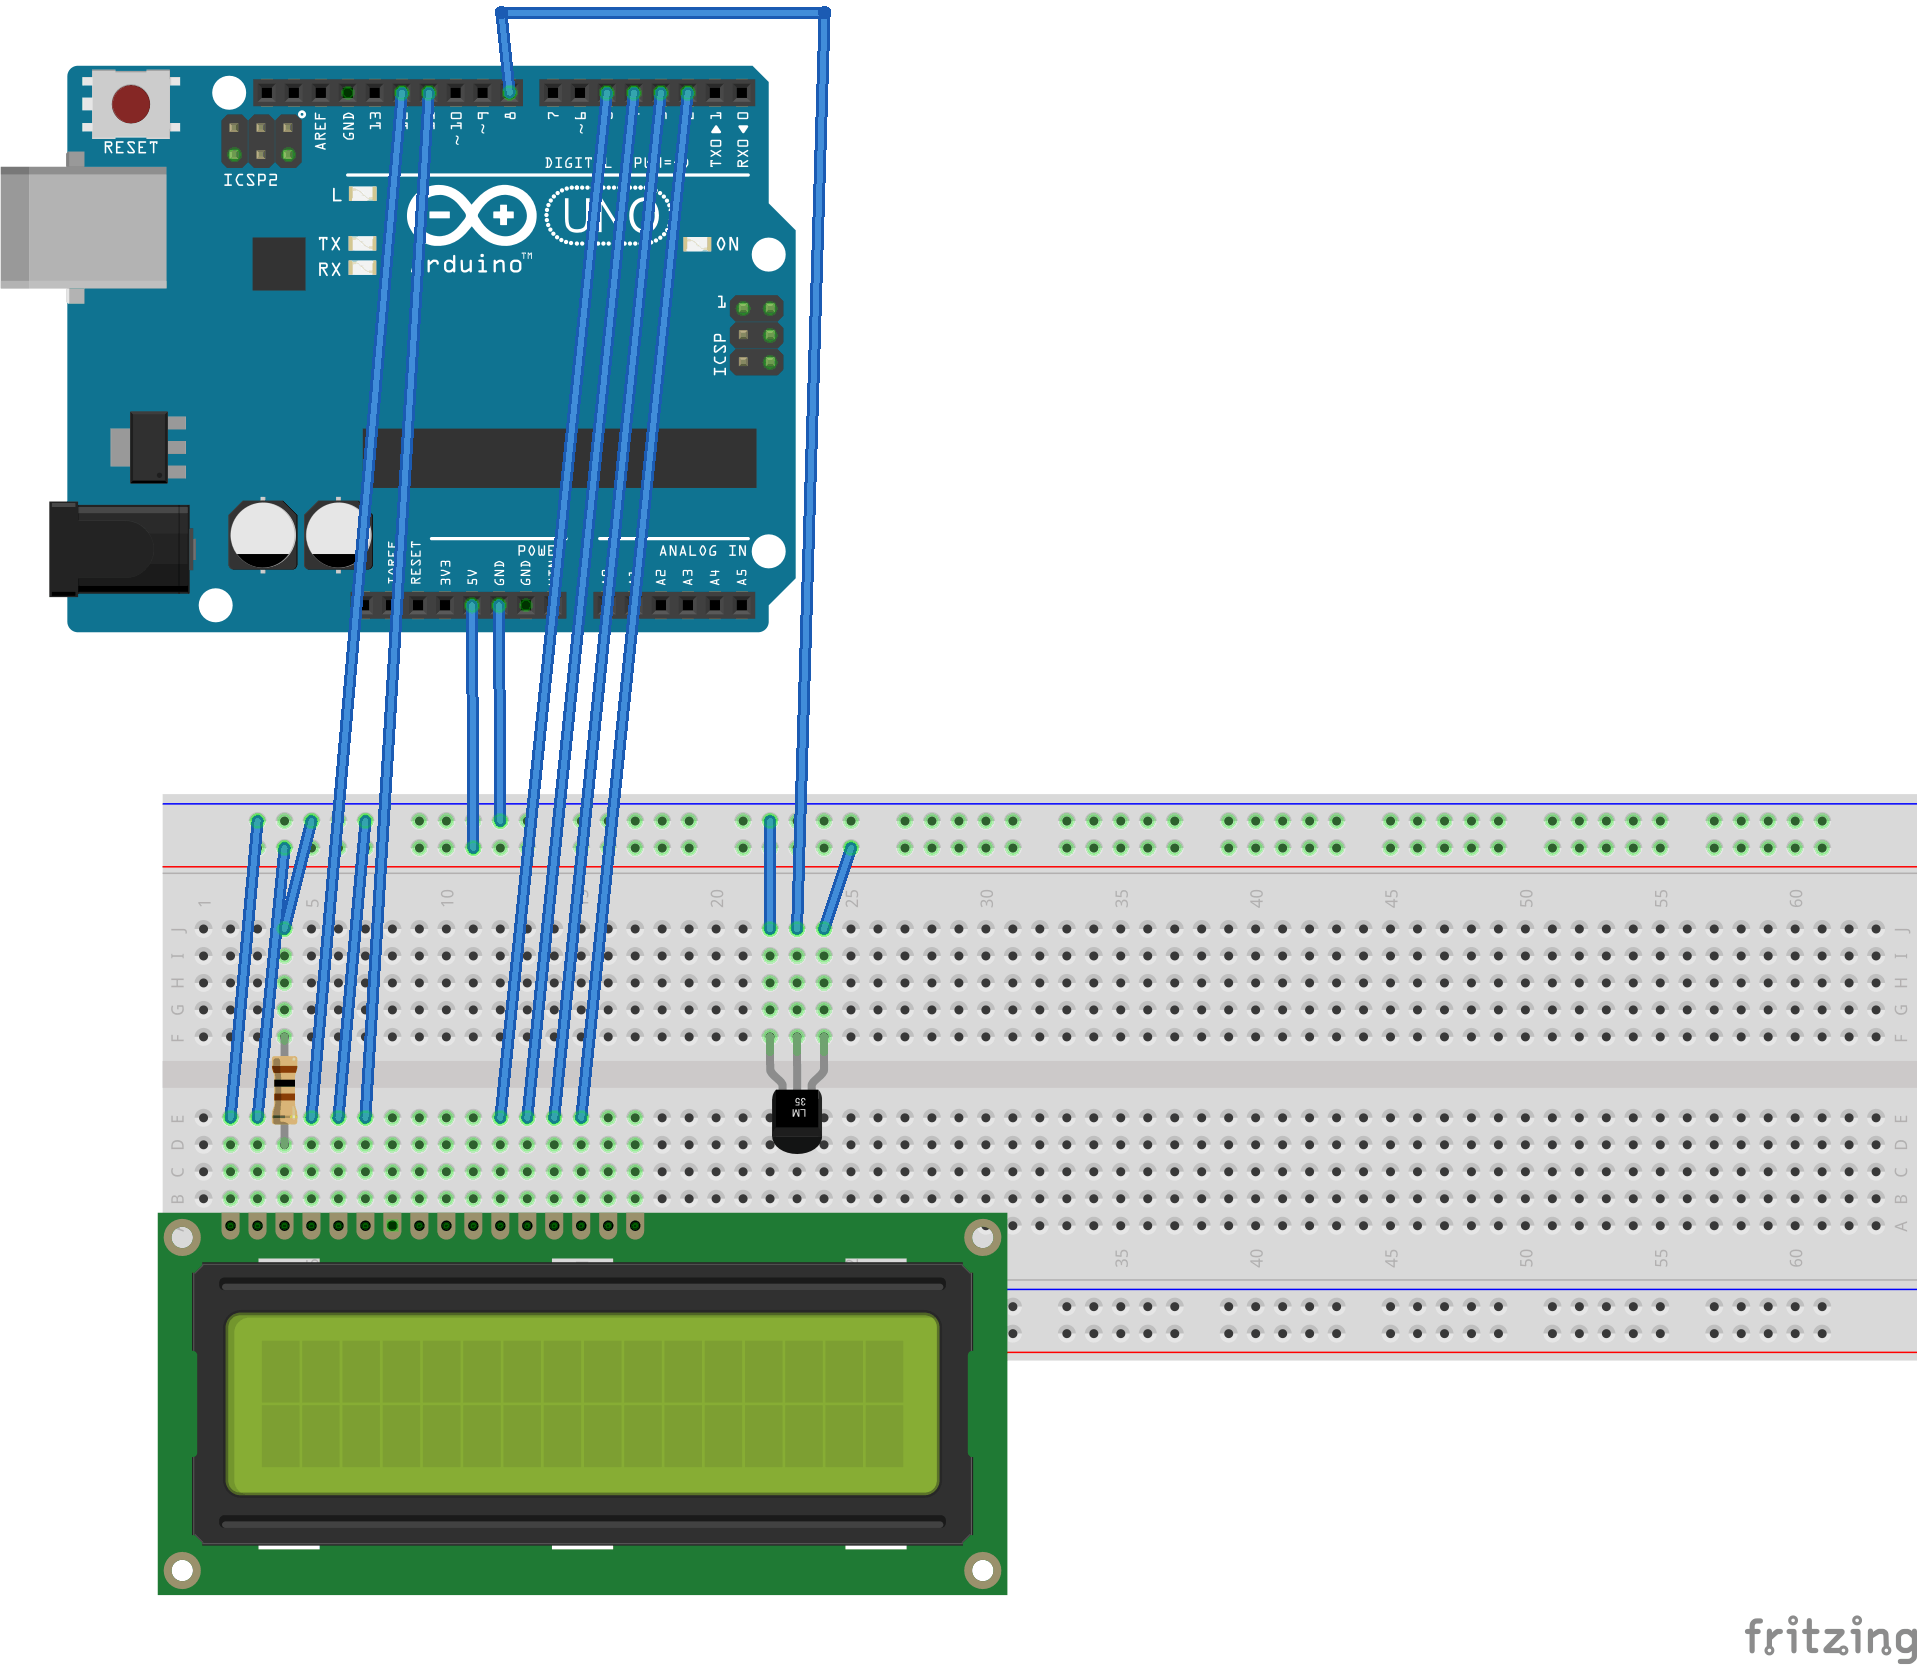
レイアウト
配線が見づらいのでもうちょっと綺麗な図ができたら更新します。
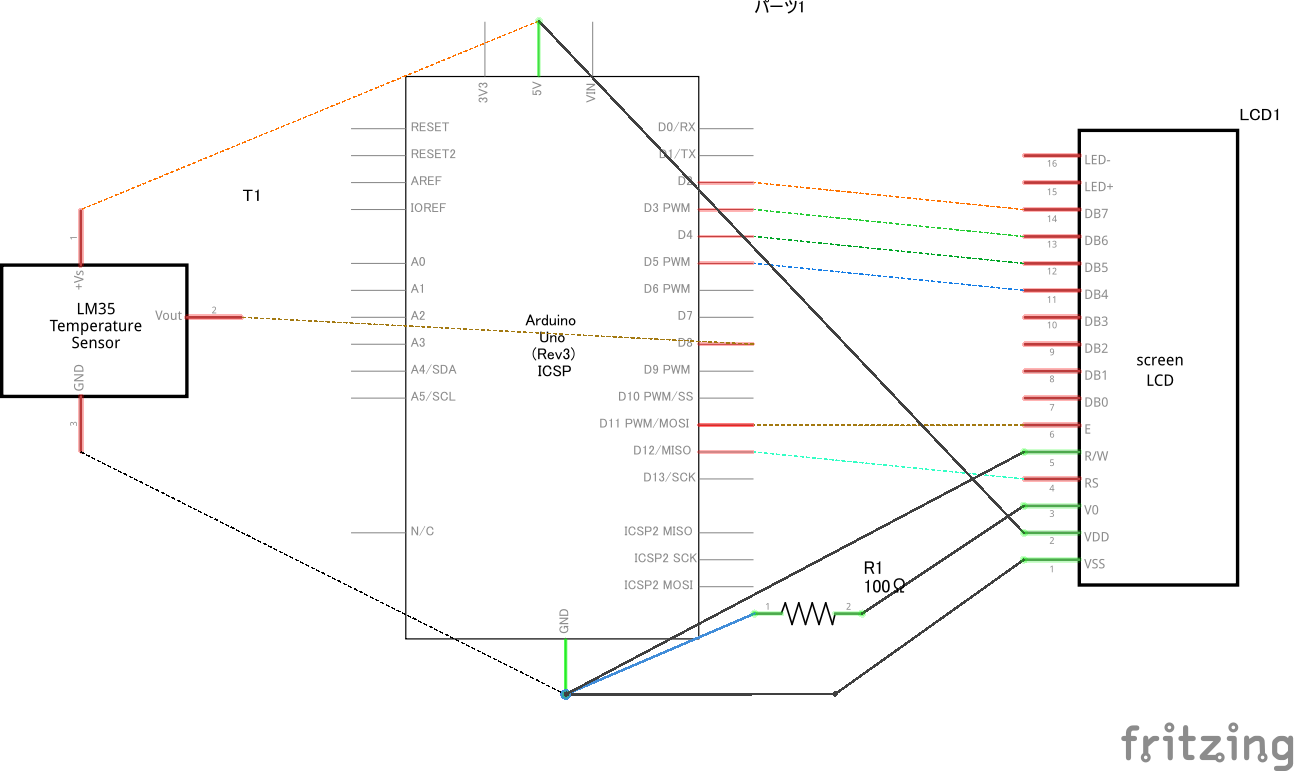
注意
上記LCDのレイアウト図だとGPIO配置が1,2,…15,16になっている。
しかし、実物のLCDのGPIO配置を見ると15,16,1,2…13,14になっている。
そのため、上記レイアウトのまま、端から配線すると間違うので気をつけること。
プログラム
#include <DHT.h>
#include <LiquidCrystal.h>

// initialize the library by associating any needed LCD interface pin
// with the arduino pin number it is connected to
const int rs = 12, en = 11, d4 = 5, d5 = 4, d6 = 3, d7 = 2;
LiquidCrystal lcd(rs, en, d4, d5, d6, d7);

const int PIN_DHT = 8;
DHT dht(PIN_DHT,DHT11);

void setup() {
  // set up the LCD's number of columns and rows:
  lcd.begin(16, 2);
  // Print a message to the LCD.
  lcd.print("hello");

  Serial.begin(9600);
  dht.begin();

}

void loop() {
  // set the cursor to column 0, line 1
  // (note: line 1 is the second row, since counting begins with 0):
  // print the number of seconds since reset:
  //lcd.print(millis() / 1000);

  delay(3000);

  float humidity = dht.readHumidity();
  float temperature = dht.readTemperature();

  Serial.print("Humidity:  ");
  Serial.print(humidity);
  Serial.println("%\t");
  Serial.print("Temperature:  ");
  Serial.print(temperature);
  Serial.println(" *C");

  lcd.setCursor(0, 0);
  lcd.print("Situdo:" + String(humidity) + "%");

  lcd.setCursor(0, 1);
  lcd.print("Ondo  :" + String(temperature) + "*C");

}
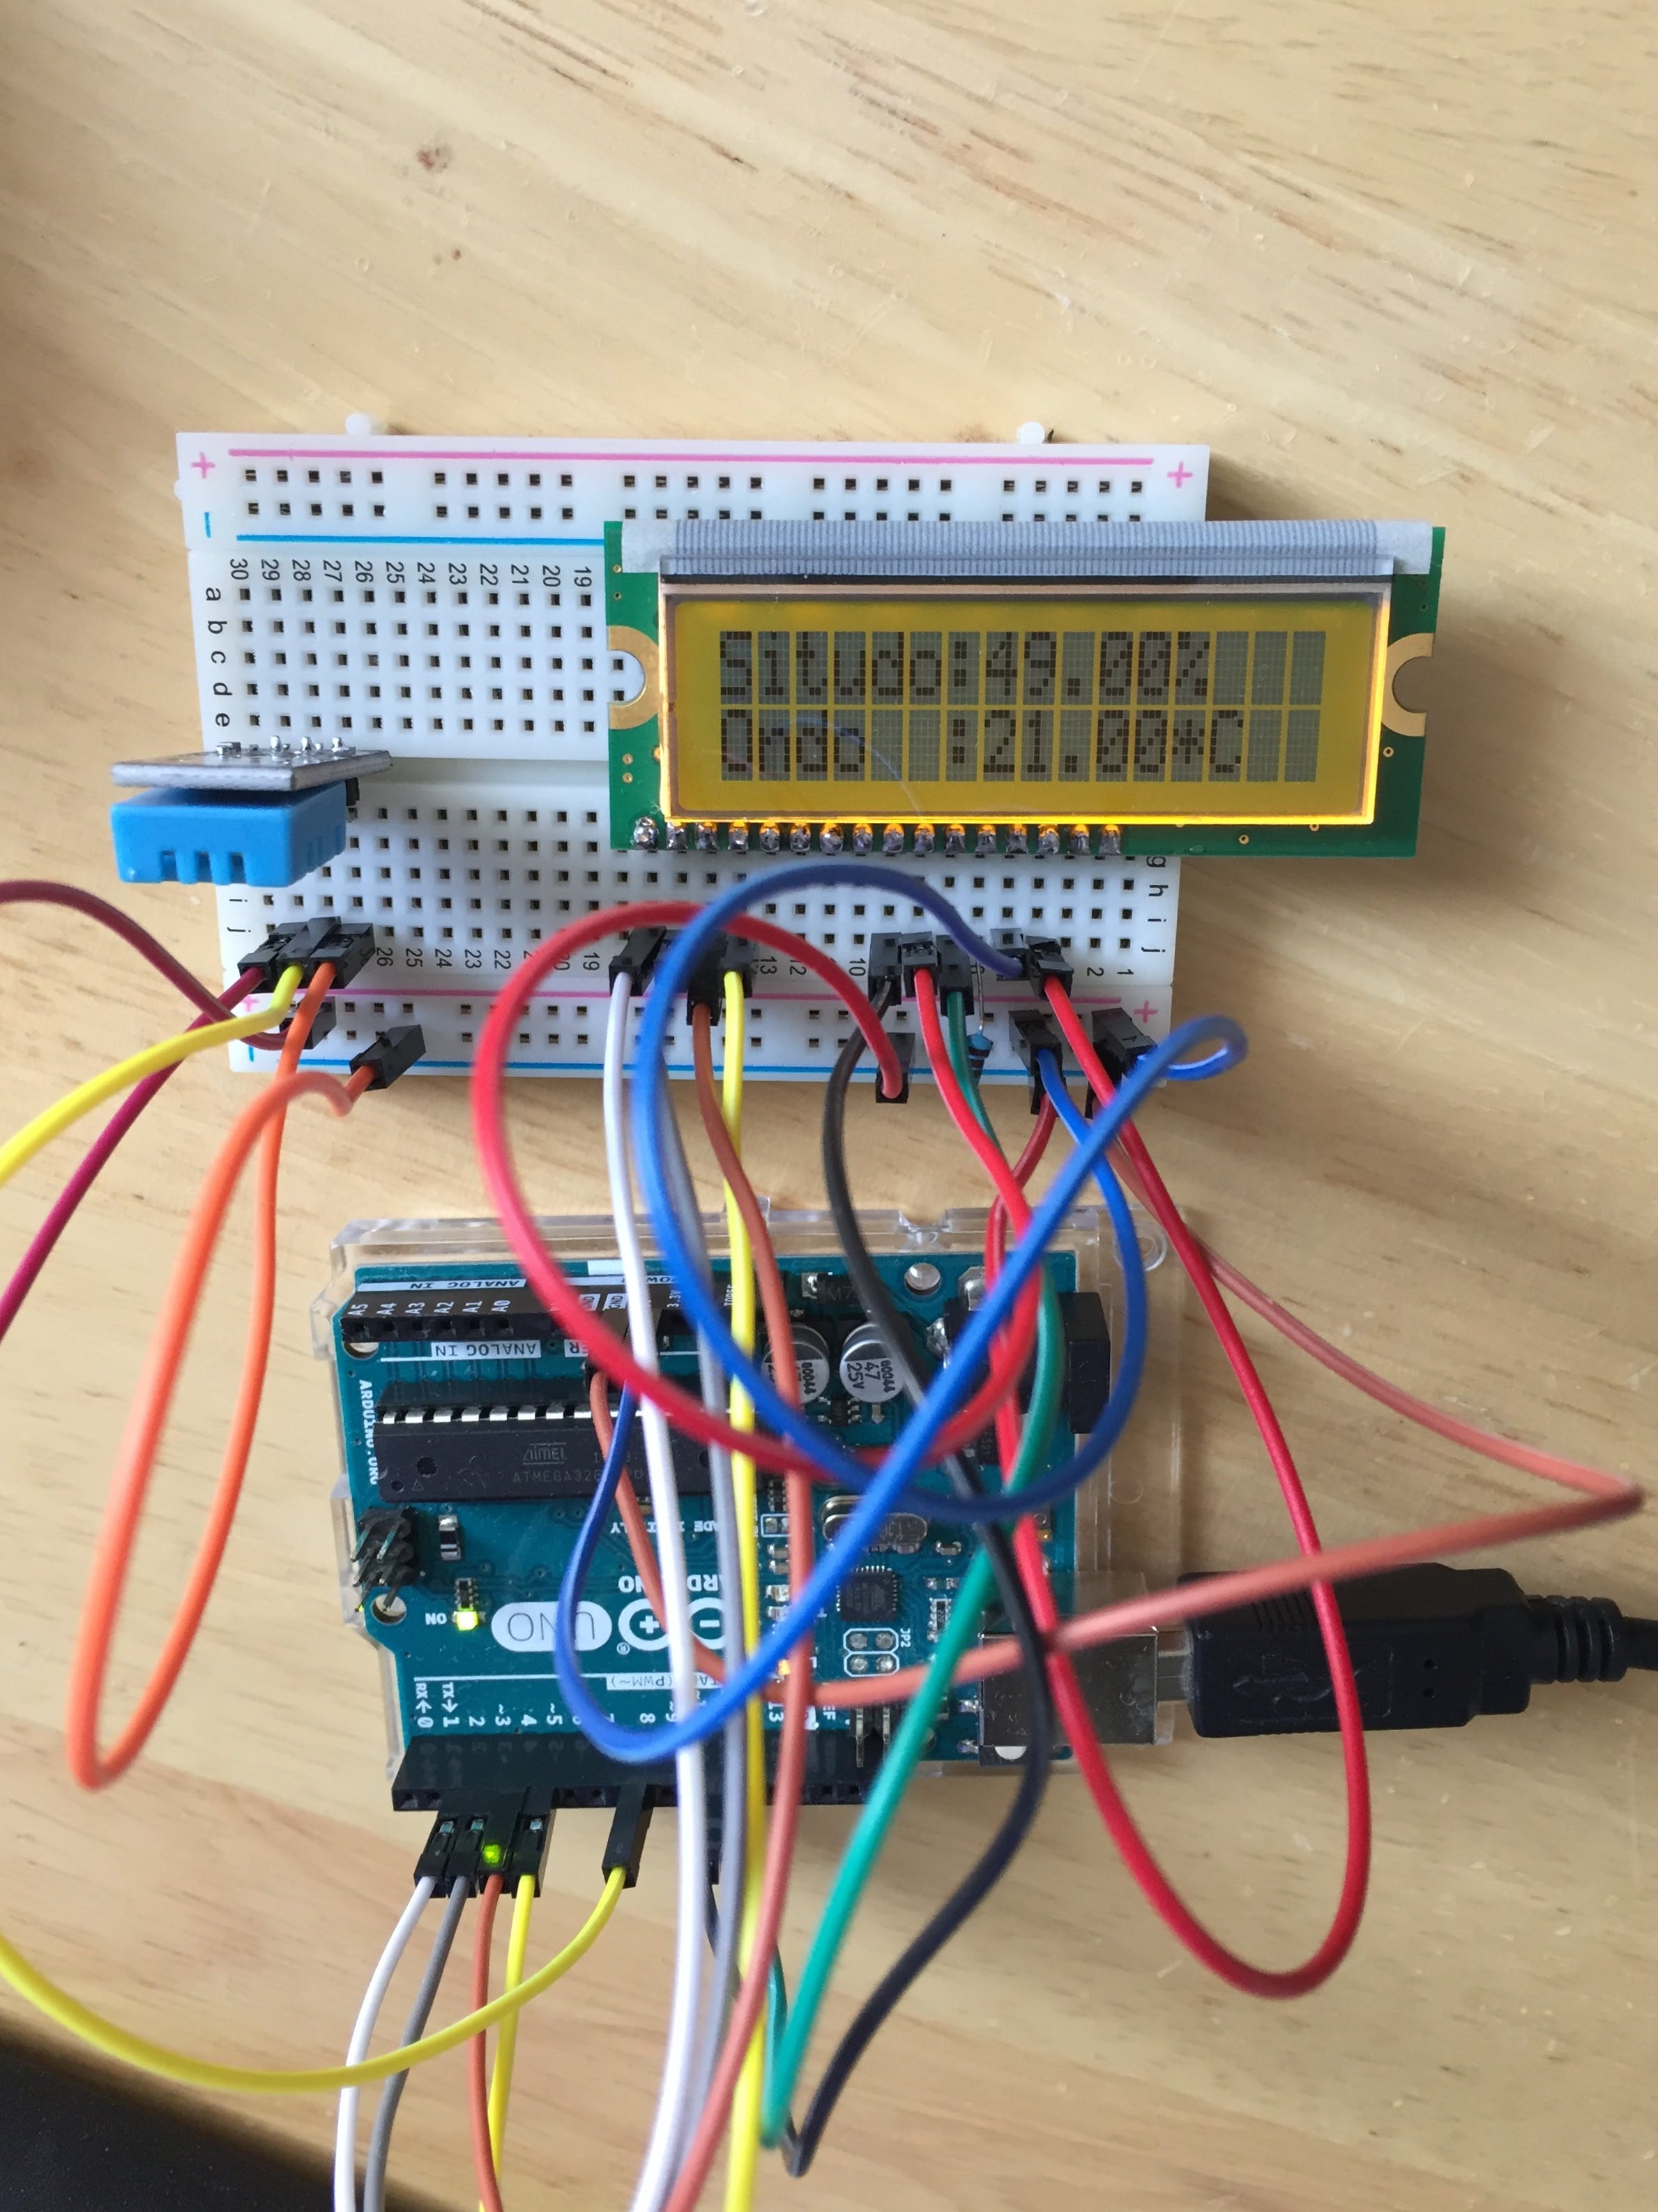
結果
シリアルモニタ側の表示
Humidity:  49.00%
Temperature:  20.00 *C
Humidity:  50.00%
Temperature:  20.00 *C
LCDディスプレイ側の表示
以上